PowerWheel Ep2 - Virtual Agent and AI Builder
Help UKRAINE
 ! Your action matters! Donate
to support Ukrainian Army! Donate to charity funds!
Organize/join street protests in your city to support Ukraine and condemn Russian aggression!
Expose and report Russian disinformation! #StandWithUkraine
! Your action matters! Donate
to support Ukrainian Army! Donate to charity funds!
Organize/join street protests in your city to support Ukraine and condemn Russian aggression!
Expose and report Russian disinformation! #StandWithUkraine AI Builder is one of my favourite announcements in June. It brings the power of AI technology to all users. Just in a few clicks, you can build and train complex AI model and then later use it in your application. Just as easy with new Virtual Agent you can setup bot that can leverage really complicated scenarios. And next thing what we should do is obvious - we need to integrate them!
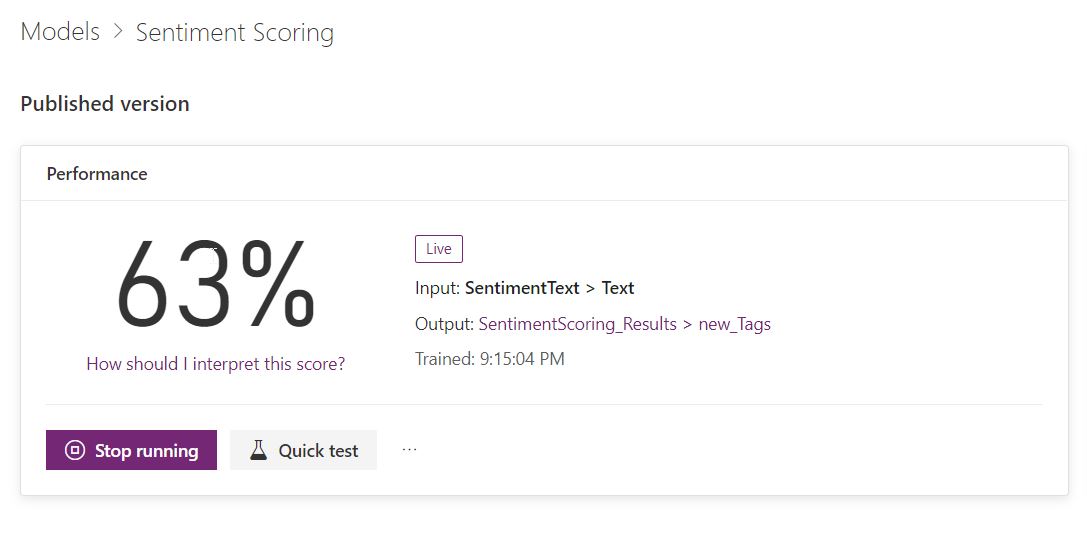
Let’s start with the AI Model itself. Right now we have 4 options available for us: Binary Classification, From Processing, Object Detection and Text Classification. In this example, I will use my prebuilt Text Classification model. It uses the simplest form of classification and divides text on Positive and Negative. Because of the simplicity of the input data, I don’t have a really high score, but it will do it for us. If you want to know more about building your text classification model please visit official docs.
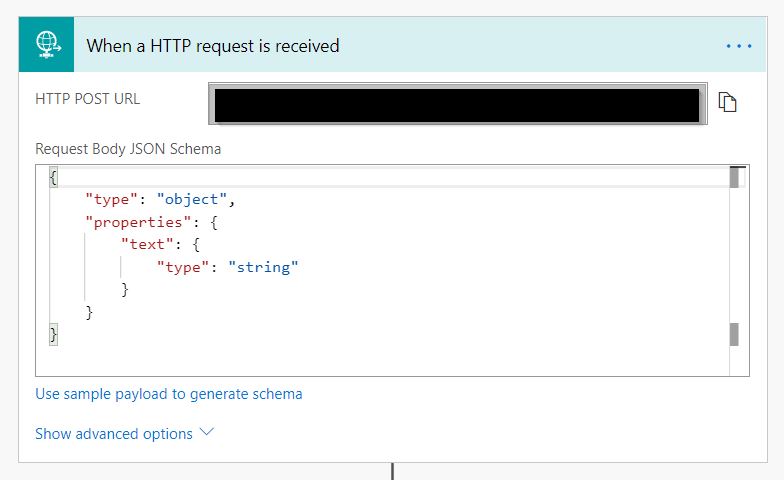
When you have your model we need to create a flow that our Virtual Agent Bot will call. You need to create your Flow inside the solution because right now Bot can call just solution aware Flows. Triggering step should be HTTP request (When a HTTP request is received). As Request Body JSON schema put the next JSON:
{
    "type": "object",
    "properties": {
        "text": {
            "type": "string"
        }
    }
}
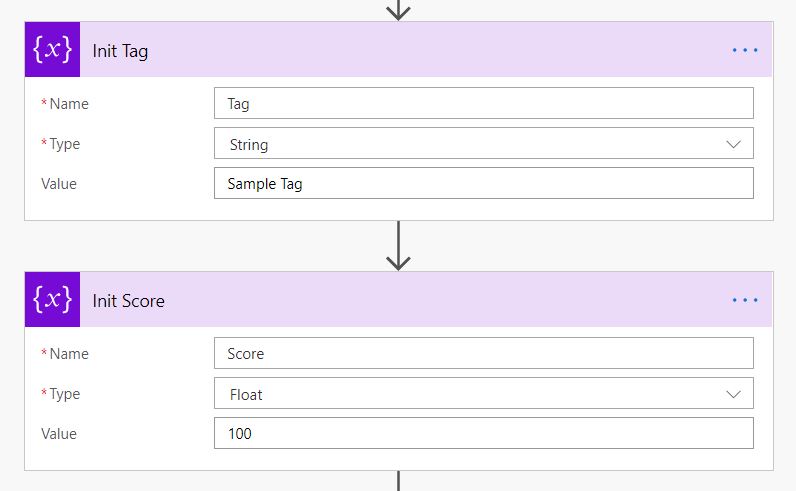
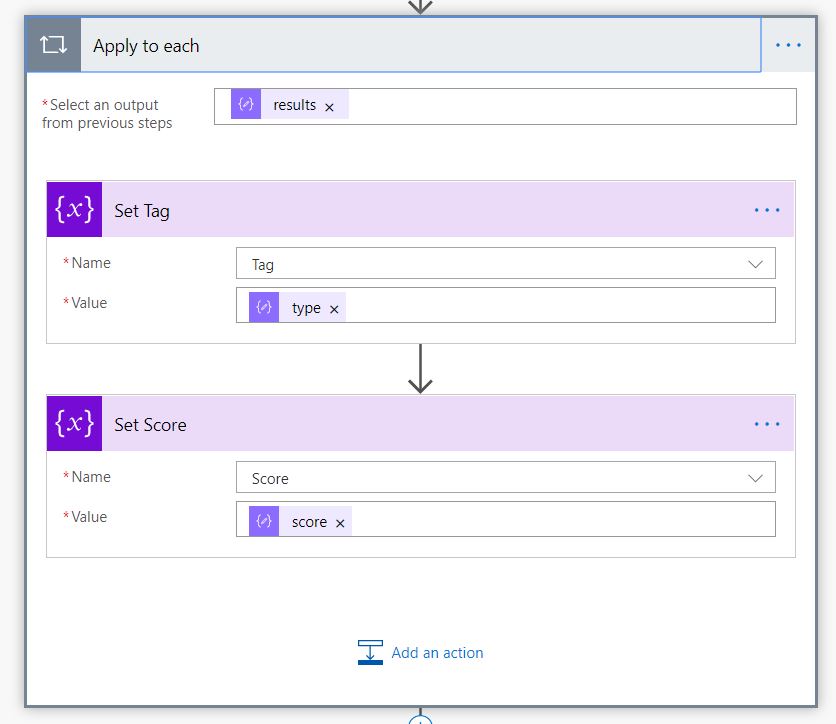
Then I will initialize two variables: Tag (text) and Score (Float). We will use them to contain our results.
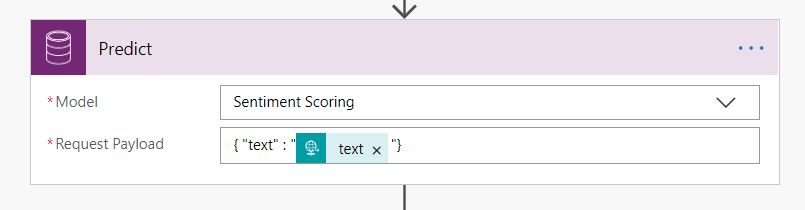
Next, we will use Predict step - this is a new CDS step that allows you to use your AI Model inside the flow. Choose your model (Sentiment Scoring in my case). And inside Request Payload put an object with text property and input text (see image below).
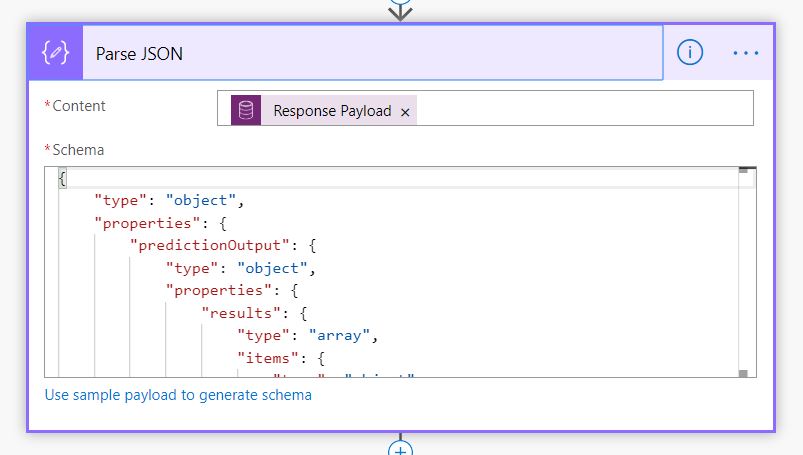
Now we need to parse JSON. Select Parse JSON step and put Response Payload as Content and next JSON as schema:
{
    "type": "object",
    "properties": {
        "predictionOutput": {
            "type": "object",
            "properties": {
                "results": {
                    "type": "array",
                    "items": {
                        "type": "object",
                        "properties": {
                            "type": {
                                "type": "string"
                            },
                            "score": {
                                "type": "number"
                            }
                        },
                        "required": [
                            "type",
                            "score"
                        ]
                    }
                }
            }
        },
        "operationStatus": {
            "type": "string"
        },
        "error": {}
    }
}
Now the last step is to set our results into our variables. Because our results will be an array (that contains just one value) we will need to use Apply to each control. Put results from our previous step there. Now we will need to set our Tag and Score variables (see picture below).
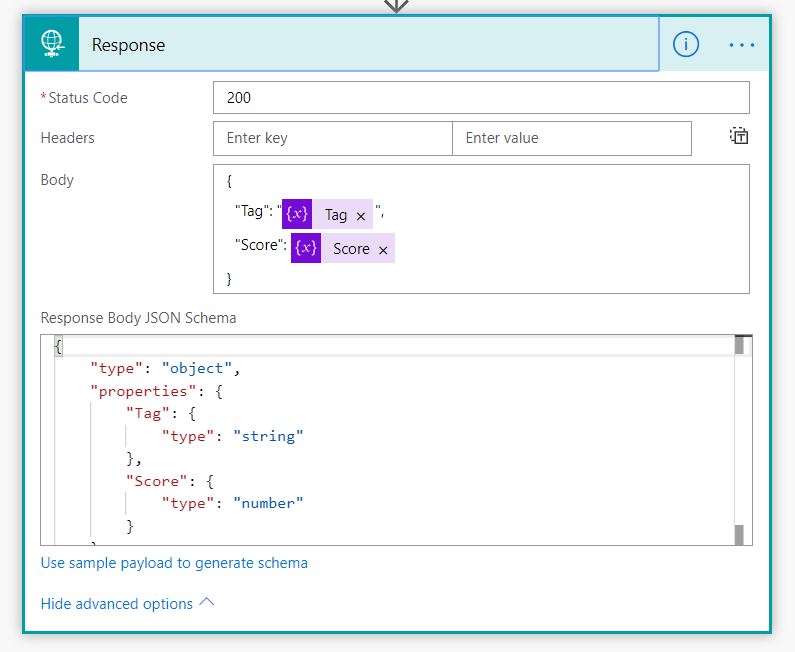
Great, let’s return our results. Select Response and return an object with Tag and Score property (don’t forget to fill Response Body JSON Schema with correct data).
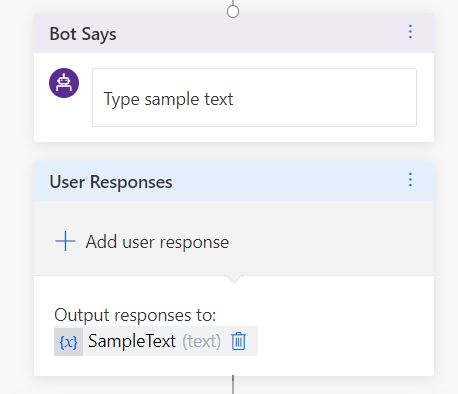
Now when our Flow is ready we need to go to our Bot. Create a new Topic (Sentiment in my case). Add User response and output it to a variable (SampleText in my case).
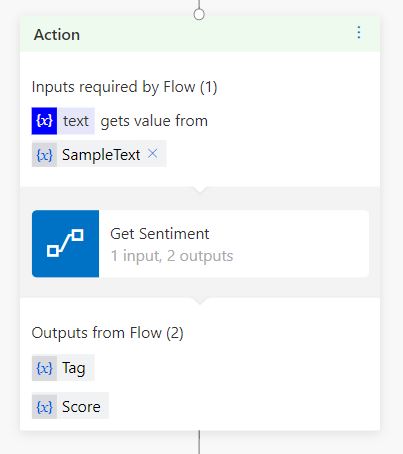
Then add Action and select your Flow (Get Sentiment). Put SampleText as input for a Flow. And then output received results.
That’s it. You can see how it works in a gif below.
I hope you found this article useful. Next time I will talk about the Portals.