Quickstart Azure Cognitive Services Speech Recognition
Help UKRAINE
 ! Your action matters! Donate
to support Ukrainian Army! Donate to charity funds!
Organize/join street protests in your city to support Ukraine and condemn Russian aggression!
Expose and report Russian disinformation! #StandWithUkraine
! Your action matters! Donate
to support Ukrainian Army! Donate to charity funds!
Organize/join street protests in your city to support Ukraine and condemn Russian aggression!
Expose and report Russian disinformation! #StandWithUkraine Introduction
I am always searching for new things and want to try them out. When browsing through the Internet I encounter an article regarding Azure Cognitive Services (more specifically Speech To Text Recognition). I was curious about how it can be used with PCF. This article is a quick start guide on how to use Azure Cognitive Service (more specifically Speech To Text part) with few tweaks for PCF in the end. The main part of this article is dedicated to Azure Cognitive Service Speech Javascript SDK and will be useful for anyone who wants to start with it. I will separate part that is related to PCF only.
In the article below I will use ACS as an abbreviation for Azure Cognitive Services for readability purpose.
Prerequisites
You need to have basic knowledge in Javascript and to have the ability to create Azure Resource (I will guide you through the process of Cognitive Services creation). Also, I will not explain how to create a PCF component itself (please refer to the official guide to had started with it).
Cognitive Services Speech Recognition Overview
Let’s talk about what is Cognitive Services before we start. I will quote MS on this one:
Cognitive Services bring AI within reach of every developer – without requiring machine-learning expertise. All it takes is an API call to embed the ability to see, hear, speak, search, understand and accelerate decision-making into your apps.
Cognitive Services are sets of different API that allow you to perform various AI-related operations.
The topic I was curious about is the ability to translate Speech To Text. You can say why do we need yet another Speech To Text when we have for example Web Speech API? Well, first of all, Web Speech API is not widely supported (for example Safari doesn’t support it at all). Second, it will not allow you to recognize the audio file, only recording trough browser itself.
Speech part of Cognitive Services allows you to do the next things:
- Speech To Text
- Text to Speech
- Intent recognition
- Speech translation
- Conversation transcription
- Voice assistants
To find more about what you can do with Cognitive Services check out their official page. If you are interested in Speech part of Cognitive Services check out their official docs
In this article, I will explain mostly usage of Speech To Text.
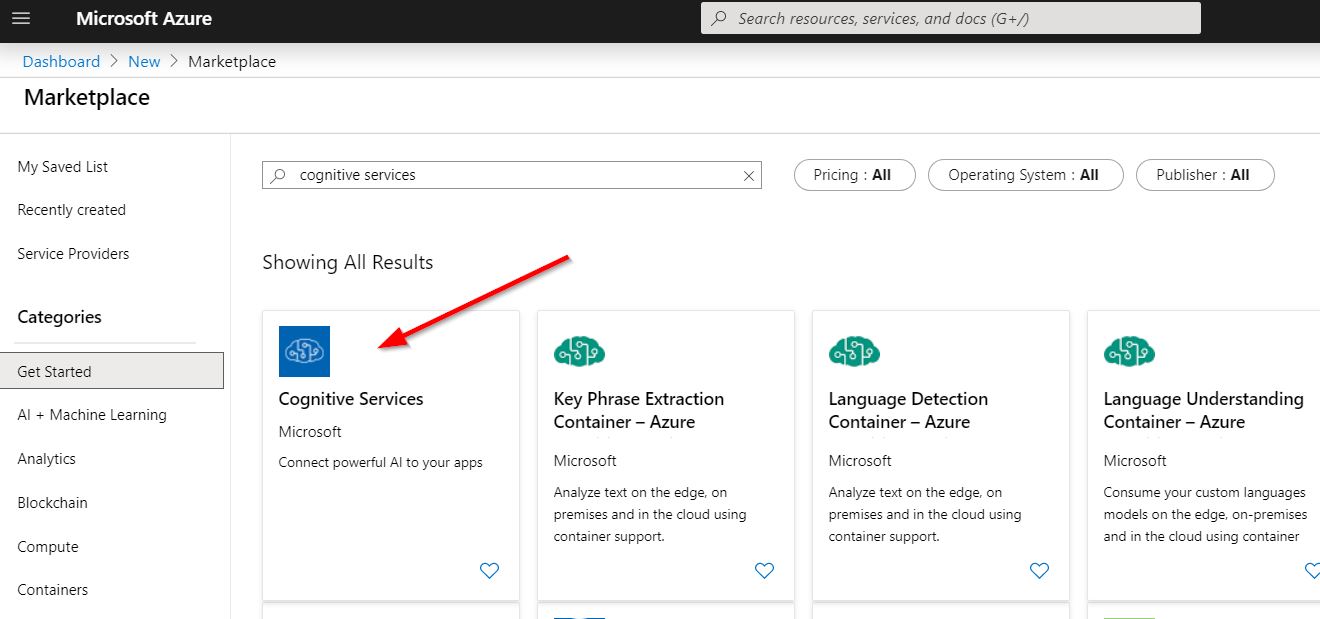
Create Azure Cognitive Service resource
The first thing that we need is to create our ACS resource. Navigate to your Azure Portal. Press Create a resource and search for Cognitive Services.
Press Create, then select you resource Name, select Subscription, Location, Pricing tier (S0 will work for trial and testing) and your resource group (if you don’t have one create a new one). Then press Create button. It can take a couple of minutes before your resource will be available.
Use ACS Speech SDK
Install ACS Speech SDK in your project
To use ACS Speech SDK in our project (PCF or any other JS project) we need to first install it. We can do it with the help of npm. Run next command in a console to install:
npm install microsoft-cognitiveservices-speech-sdkAfter the installation, we need to import SDK to use it. Use below the line of code to import it:
import * as SpeechSDK from 'microsoft-cognitiveservices-speech-sdk'Now we are able to use SDK in our project.
Main methods and events of ACS Speech SDK
To be able to perform speech recognition we will need to create SpeechRecognizer from SDK. To do so we need to create special objects - AudioConfig and SpeechConfig.
AudioConfig will contain all necessary information about audio input method.
To create AudioConfig object there are different method inside SpeechSDK.AudioConfig. Two most commonly are create from audio file or microphone.
Create from the audio file (NOTE: right now only wav files are supported):
let audioConfig = SpeechSDK.AudioConfig.fromWavFileInput(audioFile);where audioFile - is File type object obtained from HTML input or generated in code.
Create from microphone input:
let audioConfig = SpeechSDK.AudioConfig.fromDefaultMicrophoneInput();Now when we have our AudioConfig object we need to create the next one: SpeechConfig. This object contains information about your subscription, region and recognition language.
You can create SpeechConfig object using a couple of methods:
- fromAuthorizationToken - creates SpeechConfig instance from authorization token and region;
- fromEndpoint - creates SpeechConfig instance with specified endpoint and subscription key;
- fromSubscription - creates SpeechConfig instance with the specified region and subscription key.
To find out more about SpeechConfig check official reference page.
In this tutorial, we will use the simplest one - fromSubscription. For this method, we will need to know our subscription key and region. To find them open your Cognitive Service resource. Under Quick start section, you will be able to find your Subscription Key (see image below).

To find your region open Overview section and find Location.
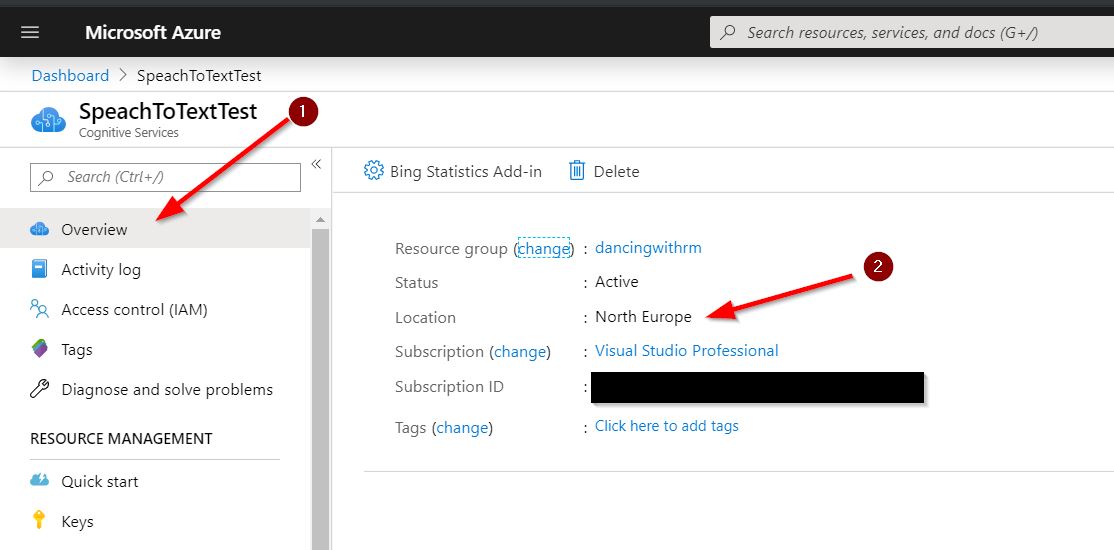
As subscription region, you need to pass a location in lowercase and without spaces. For example, my resource location is North Europe so I will pass “northeurope” as the region.
Create SpeechConfig using code below:
let speechConfig = SpeechSDK.SpeechConfig.fromSubscription("YOUR_API_KEY", "YOUR_REGION");Next, we need to specify speech recognition language as part of SpeechConfig. In my case, I will use English (US) - “en-US”. You can find a list of supported languages via next link.
To add language to SpeechConfig use code below:
speechConfig.speechRecognitionLanguage = "en-US";Now we have everything to create a SpeechRecognizer object:
let speechRecognizer = new SpeechSDK.SpeechRecognizer(speechConfig, audioConfig);After the speech recognizer creation, we can start to perform recognition operation itself. We have two recognition methods: recognizeOnceAsync and startContinuousRecognitionAsync. They suit different purpose:
- recognizeOnceAsync - short form audio recognition. Waits till the long silence or 15 seconds of audio;
- startContinuousRecognitionAsync - for continuous audio stream recognition. Will stop only after stopContinuousRecognitionAsync method is called. User needs to subscribe to events to receive and evaluate results.
In this tutorial, we will focus on the first method.
recognizeOnceAsync has two optional parameters - success callback function and error callback function. If you will call recognizeOnceAsync without parameters you need to subscribe to recognized event to receive results (will be shown later). In the success callback function will be passed SpeechRecognitionResult object that has two options that we will need to determine the execution result - reason and text. reason property is enum containing different result code like SpeechSDK.ResultReason.RecognizedSpeech or SpeechSDK.ResultReason.Canceled etc. If the reason is RecognizedSpeech result object will also contain text property - final recognition result.
See the below code as an example:
speechRecognizer.recognizeOnceAsync(
    (result) => {
        //success callback
        // triggers when recognition is finished and session is over
        switch (result.reason) {
            case SpeechSDK.ResultReason.RecognizedSpeech:
                // Speech recognized successfully
                yourResultDiv.innerHTML = "Result: " + result.text;
                break;
            case SpeechSDK.ResultReason.NoMatch:
                // Speech was not matched successfully. See output for more details
                let noMatchDetails = SpeechSDK.NoMatchDetails.fromResult(result);
                yourResultDiv.innerHTML = "No Match: " + SpeechSDK.NoMatchReason[noMatchDetails.reason];
                break;
            case SpeechSDK.ResultReason.Canceled:
                // Speech recognition was cancelled. See output for more details
                let cancellationDetails = SpeechSDK.CancellationDetails.fromResult(result);
                yourResultDiv.innerHTML += "Canceled: " + SpeechSDK.CancellationReason[cancellationDetails.reason];

                if (cancellationDetails.reason === SpeechSDK.CancellationReason.Error) {
                    yourResultDiv.innerHTML += " Error: " + cancellationDetails.errorDetails;
                }
                break;
            default:
                break;
        }
    },
    (error) => {
        //error callback
        console.error("Error occured during recognition", error);
    }
);
Finally, let’s explore event handlers that available for us in SpeechRecognizer class:
- sessionStarted - will be triggered when the new session is started with the speech service;
- sessionStopped - will be triggered when the session ends;
- speechStartDetected - will be triggered when speech start detected;
- speechEndDetected - will be triggered when speech end detected;
- recognizing - will be triggered when intermediate recognition results are received;
- recognized - will be triggered when the final recognition result received.
For example, you want to show what data is processed by recognition service right now. You can subscribe to recognizing the event and show intermediate recognition results. See code below:
speechRecognizer.recognizing = (recognizer, event) => {
    console.log("Recognition event:", event);
    yourResultDiv.innerHTML = event.result.text;
};
If you want to find more about SpeechRecogizer class visit official reference page.
That’s it. Now you have enough information to get started with Speech SDK in your Javascript project. If you want to start without any coding at all you can use quickstart sample from MS.
Using ACS in PCF (local development)
This part applies describes specifics of usage ACS in PCF components or to be more particular to the local testing in harness.
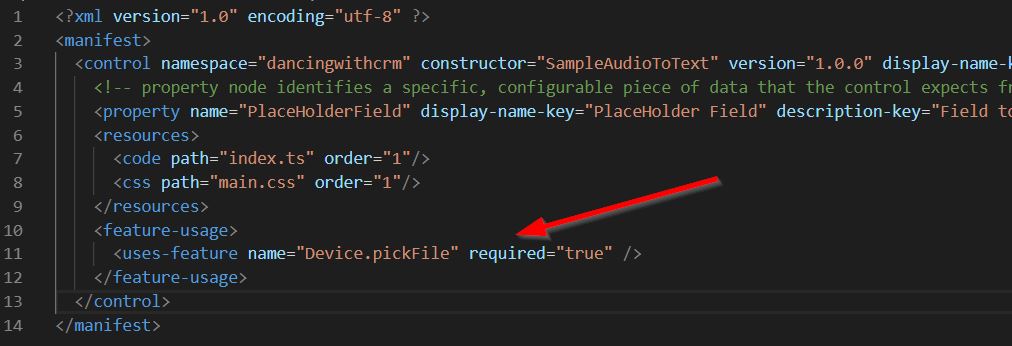
As described previously two most common options for creating AudioConfig are from wav file or the microphone. To test from file option I added HTML input to my test component. To my surprise, it was hidden. Simple check reviled to me that by default harness add styling that hides all input of type “file” and remove all events. I think this is because we have a method available for us under context.device. It is called pickFile (don’t forget to enable Device.pickFile under feature-usage in ControlManifest.Input.xml - see image below).
However when I tried to use context.device.pickFile it didn’t open file selection window and just returned undefined as a result. After small investigation, I noticed that in harness they use Xrm.Proxy that returned undefined by default. In the real environment, it works as intended. So what should we do in local development? Well, for me the solution was to use regular HTML input in local development and for real deployment switch to pickFile. To override default styling for the input you can use CSS below:
/* Overwrite default styling from PCF to show and enable input */
.audio-input{
    opacity: 1 !important;
    position: relative !important;
    pointer-events: all !important;
    width: auto !important;
    height: auto !important;
}
Next thing that you need to one when using pickFile it returns FileObject array. However, AudioConfig constructor allows only using File. So you will need to have small convert function. You can use my code below:
private convertToFile(fileObject: ComponentFramework.FileObject): File {
    return new File([fileObject.fileContent], fileObject.fileName, { type: fileObject.mimeType });
}
You can find full code with a sample component via this link.
Conclusion
This quick start guide explains how to start using Azure Cognitive Services Speech SDK in your javascript project, explaining main methods, events and resources necessary. Also, it contains an explanation of how to use ACS in PCF (both in local development and in a real environment). Hope you find it useful. If you have any feedback leave a comment below.