Deployment Slots for Azure Functions
Help UKRAINE
 ! Your action matters! Donate
to support Ukrainian Army! Donate to charity funds!
Organize/join street protests in your city to support Ukraine and condemn Russian aggression!
Expose and report Russian disinformation! #StandWithUkraine
! Your action matters! Donate
to support Ukrainian Army! Donate to charity funds!
Organize/join street protests in your city to support Ukraine and condemn Russian aggression!
Expose and report Russian disinformation! #StandWithUkraine There are a lot of different ways to integrate Dynamics with different systems - Flow, KingswaySoft SSIS, Scribe, Azure Functions, etc. All of them can suit a different kind of scenarios and might be not applicable to others. For one of our integrations, we are using Azure Functions. It is a simple API that can be used by 3rd party systems. Last week I got a task - provide an API for the testing purpose that should be connected to our dev Dynamics instance. And that API should be the same as we already have. After some searching, I found an answer - Azure Deployment Slots.
So what is Azure Deployment Slot? Quote from Microsoft:
Deployment slots are live apps with their own host names. App content and configurations elements can be swapped between two deployment slots, including the production slot.
Basically, slots provide you with an ideal solution for testing everything on the near-live environment and being able to rapidly deploy changes to production with no downtime and in case if something went wrong rollback to the previous state. Also, you can have different slot specific app configuration that will not be swapped allowing you to create much more sophisticated usage scenarios.
Create Deployment Slot
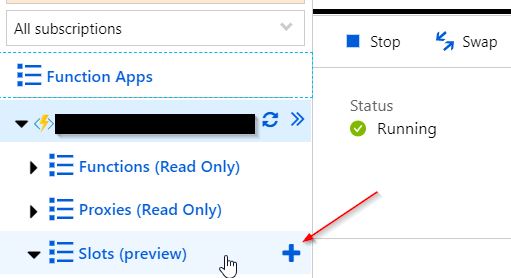
First of all, you need to go to the Azure Portal and open your function app. Under your function app, you can see Slots (Preview) section. Press + sign to create a new slot (see picture below). An important note here: under Consumption Plan you can have just one additional slot.
After you click on + button you Create a new deployment slot blade will open. Here you need to type the name of your Slot. It will be used to generate URL for your slots azure function instance. For example, you will name your slot Development and your URL will look something like that:
your_function_name-development.azurewebsites.net
It will take some time for Azure to create your deployment slot. After it will be created you will need to upload your function to that slot. You can do it using Visual Studio. Open your functions app project, press Publish and create a new profile. There select the existing App Service and select your deployment slot. That’s it. Now you can publish your code to your deployment slot.
Create slot aware application settings
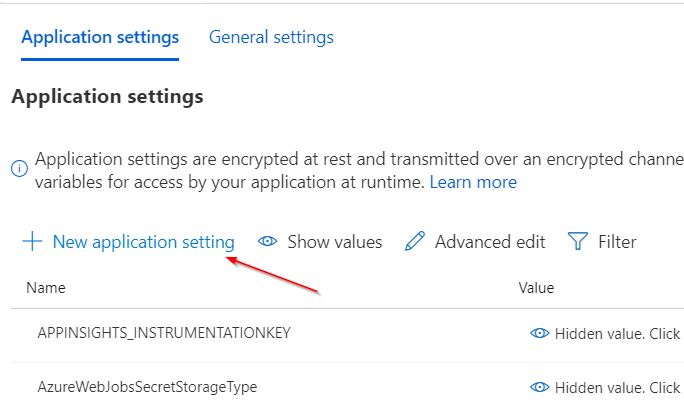
Next thing that you definitely need to know is how to create slot aware application settings. Application settings are global configuration options that affect all functions inside function app. To create an application setting open your function app then select Configuration. It will open Application settings blade. There select New application settings
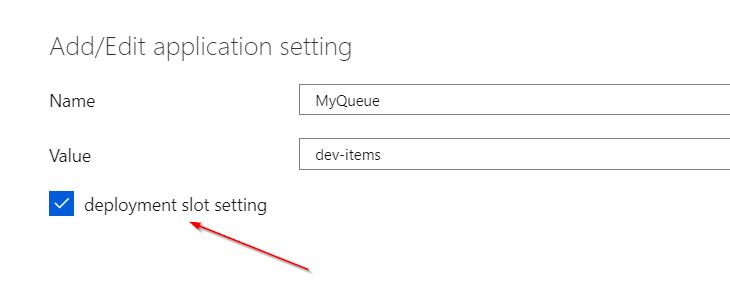
This will open Add/Edit application blade. There you can type the Name of the setting and Value for it. Notice that there is a checkbox under Value field called “deployment slot setting”. If you checked it this setting won’t be swapped. Don’t forget to create settings on both your production and development slot and mark them as “deployment slot setting”.
Now, when we created an application setting we need to know how to use them in code. For example, I created two settings called MyQueue and MyConnection. MyQueue will contain the name of the queue that I will use to trigger my queue function. And MyConnection will contain connection string to my CRM instance. Let’s say we have a function called MySimpleQueueFunction and we want to connect it with our queue. To do so we need to wrap the variable name in the code with % sign (see code below).
[FunctionName("MySimpleQueueFunction ")]
public static async Task<HttpResponseMessage> Run(
    [HttpTrigger(AuthorizationLevel.Anonymous,"get", "post", Route = null)]HttpRequestMessage req,
    [Queue("%MyQueue%", Connection = "AzureWebJobsStorage")] ICollector<string> myDestinationQueue,
        TraceWriter log)
But what should we do if we need to use our setting inside the function itself? Well, Microsoft provided us with this simple function:
public static string GetEnvironmentVariable(string name)
{
    return System.Environment.GetEnvironmentVariable(name, EnvironmentVariableTarget.Process);
}
And to get value from our variable we can do something like that:
// some code
string connectionString = GetEnvironmentVariable("MyConnection");
// use connection string
Great we are almost done. Now if we wanted to use these variables in local development we need to specify them in our local.settings.json file.
{
  "IsEncrypted": false,
  "Values": {
    "AzureWebJobsStorage": "UseDevelopmentStorage=true",
    "AzureWebJobsDashboard": "UseDevelopmentStorage=true",
    "MyQueue": "<your_queue_name>",
    "MyConnection": "<your_connection_string>"
  }
}
How to perform a Swap
Last, but certainly not the least is the Swap process itself. When you tested everything and ready to deploy your changes to production you need to do next: select your dev function. You can see Swap button (see image below).
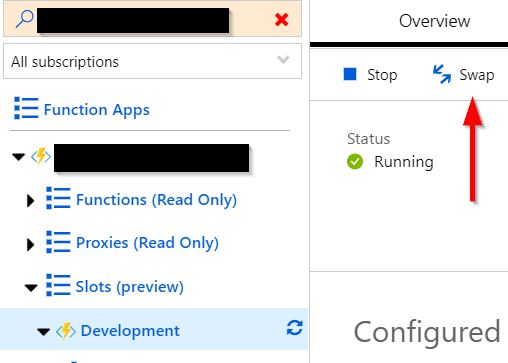
It will open the blade with swap information: Source and Destination. Select development as Source and production as Target. Then press Swap button. Also, you can see what settings will be changed after the swap in Config Changes tab. And that’s it. Azure will take care of swapping everything.

If you want to know more about what happens during the swap you can check it here.
That’s it. I hope this information was useful for you. I didn’t cover here a lot of things like auto-swap feature and other things as this article is just an introduction to deployment slots. If you want to know more please visit Microsoft official documentation page for Azure Deployment Slots (here).